Install the Plugin
The Aion4j plugin available for IntelliJ allows you to create, test, compile, deploy, and call your Java dApps, all from within the same IDE. No more copy-and-pasting contract from your local machine to a browser based IDE just to check if things actually work!
Install the latest stable build, or load the bleeding-edge edition.
Standard Installation
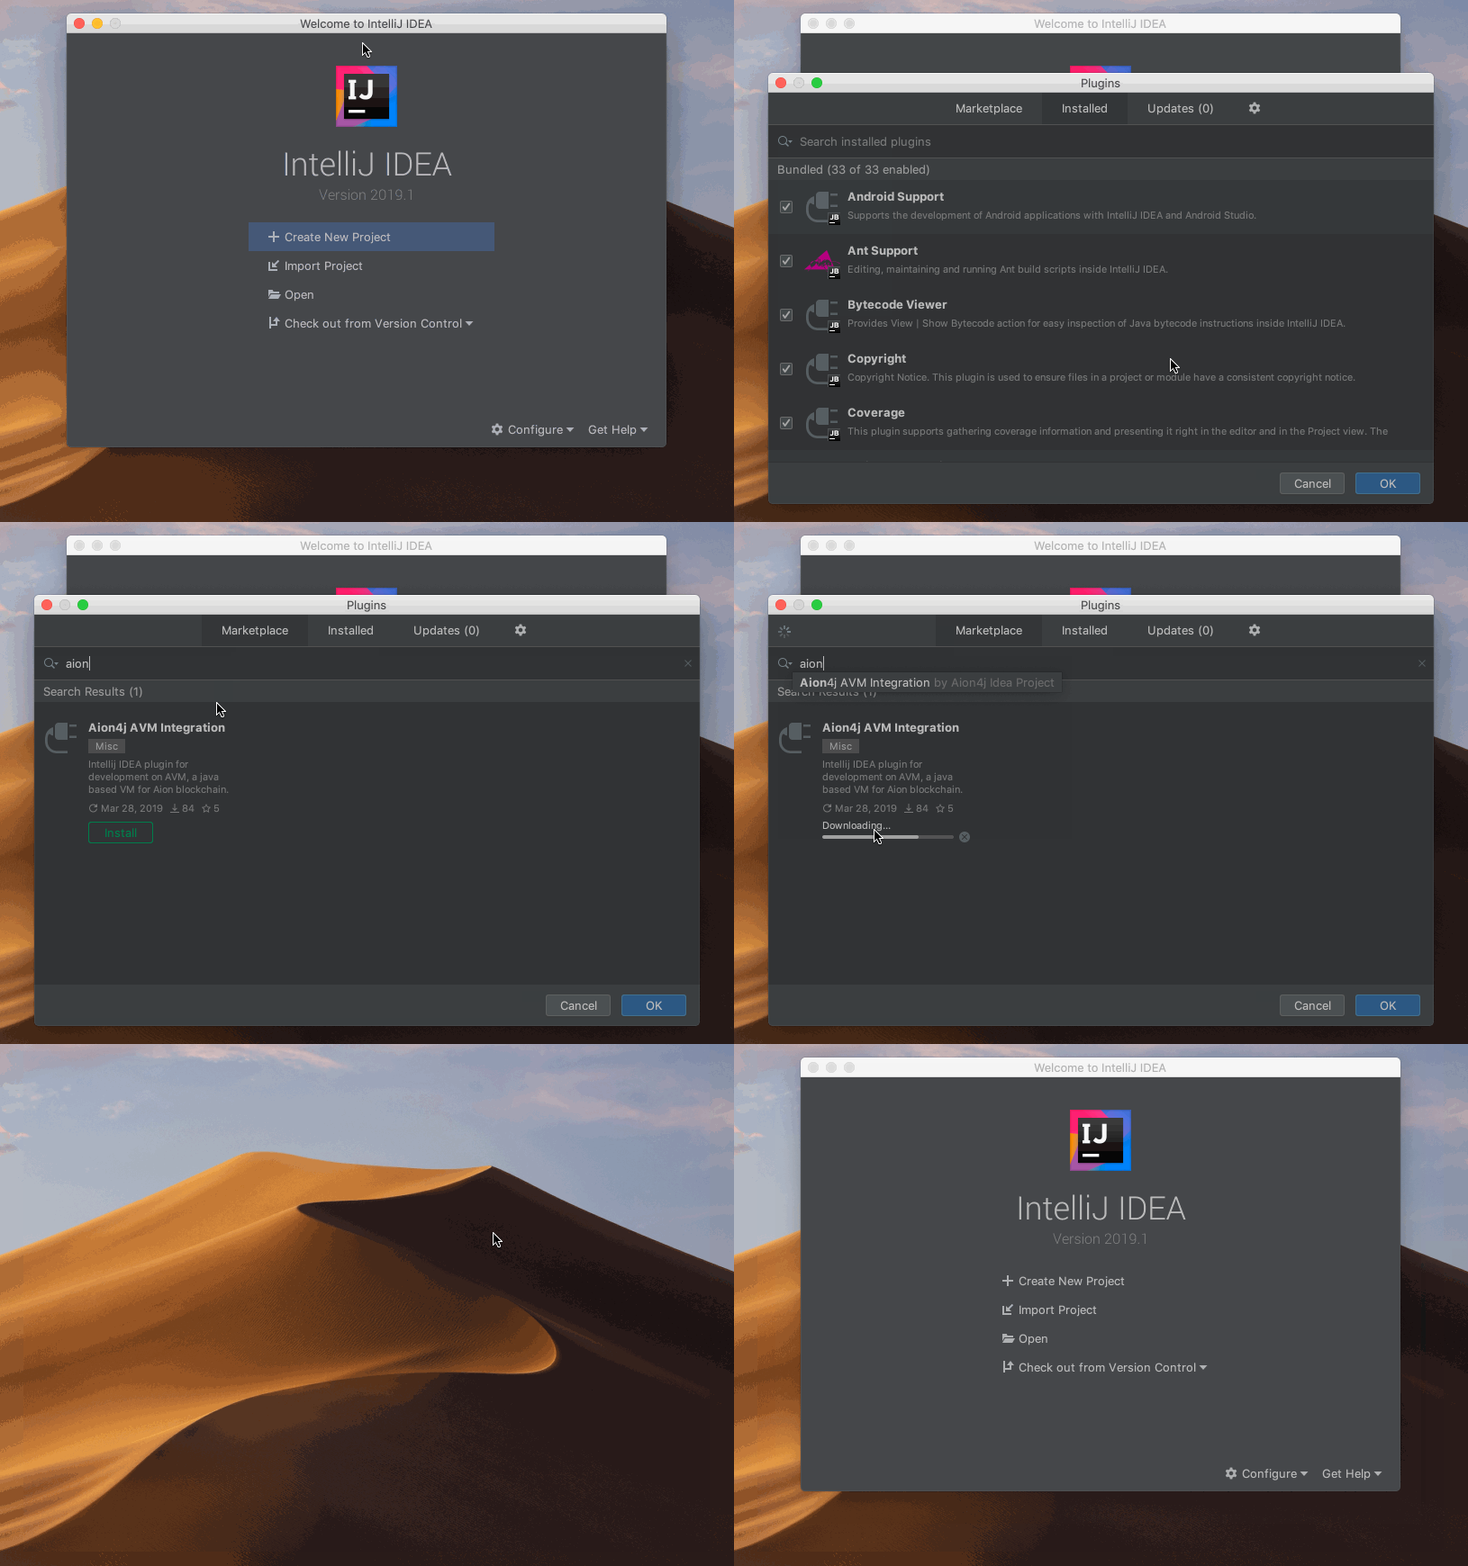
The installation process for the Aion IntelliJ plugin is incredibly simple, thanks to the inclusion of the IntelliJ Plugin Marketplace. This is the recommended installation method.
- Open IntelliJ and close any open projects by going to File → Close Project.
- Click Configure → Plugins at the bottom of the window.
- Select the Marketplace tab and search for
aion. - Click Install under the Aion4j AVM Integration plugin.
- Click Restart IDE → Restart.
- The plugin is now installed.

Bleeding Edge
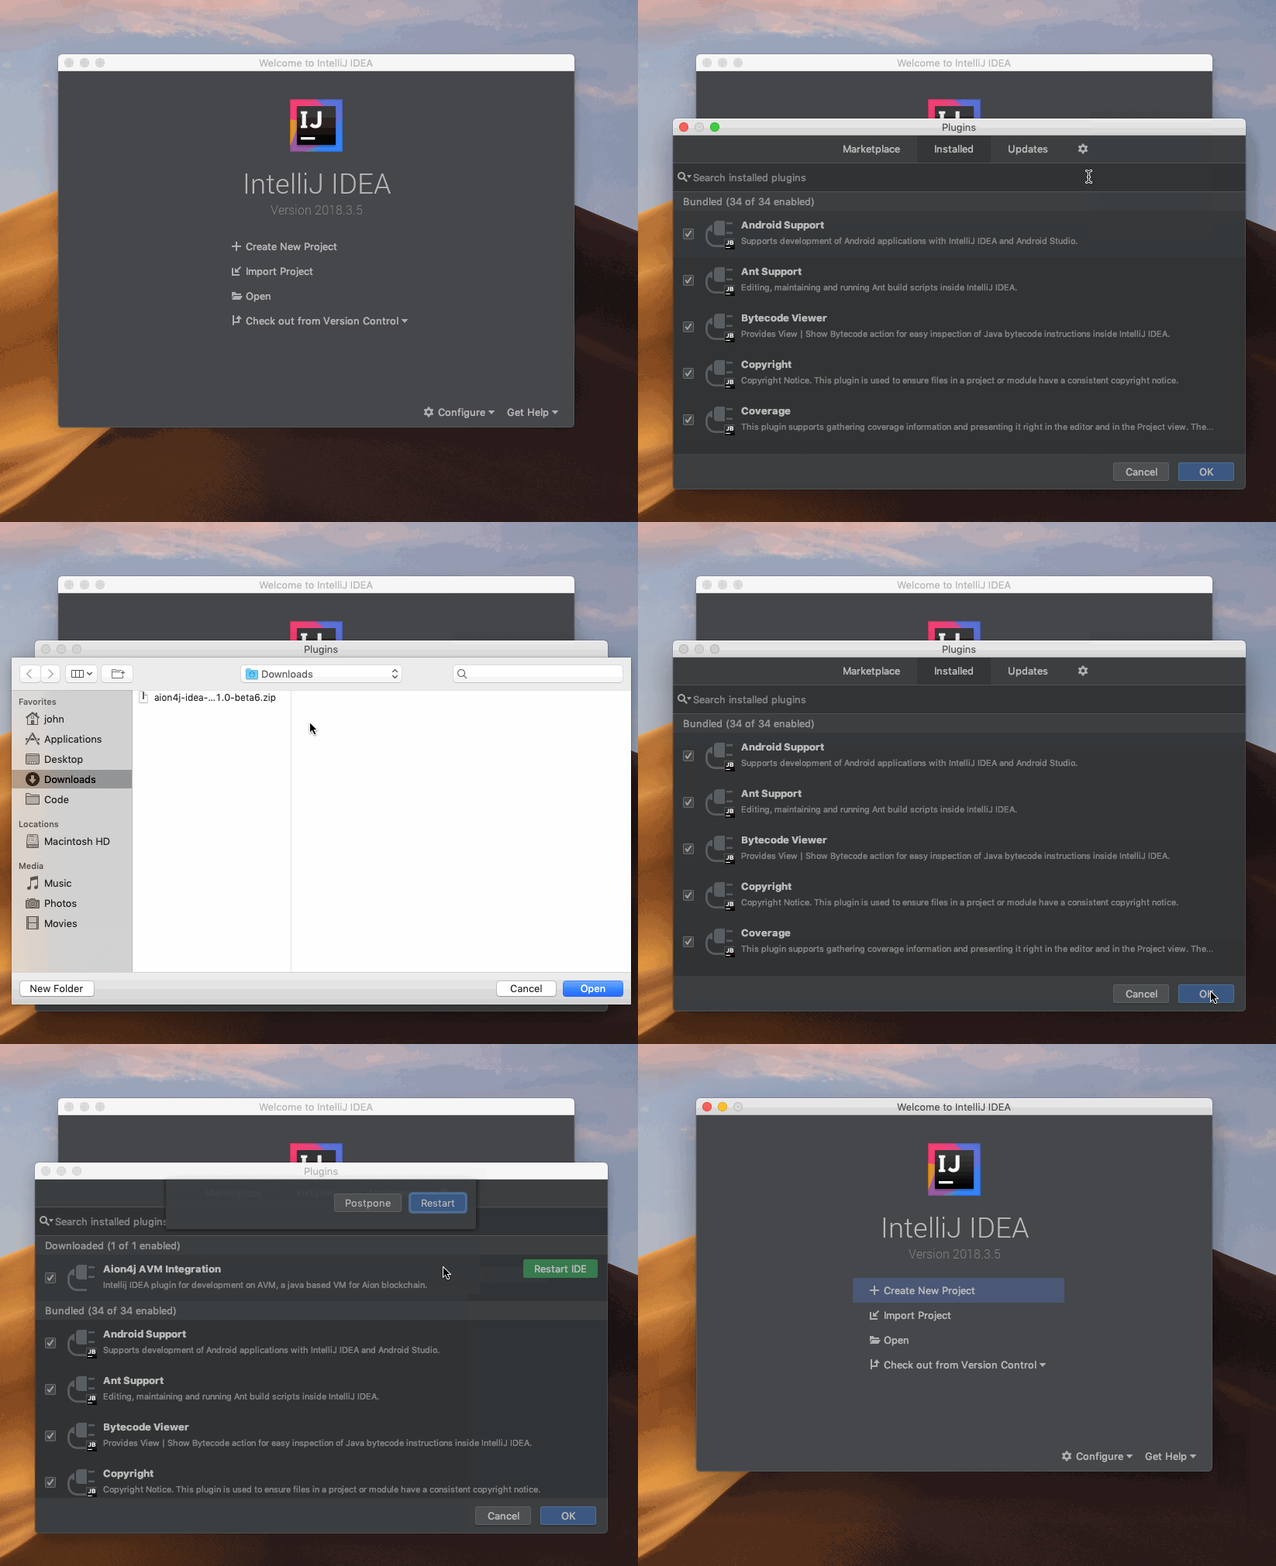
Some users prefer to have the very latest build possible, regardless of how stable it is. Follow these steps if you want to experience and test the very latest build of the plugin. This method is not stable, and is not recommended for new users. Only do this if you want to test the latest build. You will need to uninstall any other version of the plugin before attempting to install another version. You can only have one version of the plugin installed at any one time.
- Open your browser and go to the Aion4j Idea Plugin release page.
- Download the
zipfile for the version you want to test. The latest version is always at the top of the page. - Open IntelliJ and close any open projects by going to File → Close Project.
- Click Configure → Plugins at the bottom of the window.
- Click the gear icon and select Install Plugin from Disk.
- Navigate to where you downloaded the
zipfile. - Select the
zipfile and click Open. - Click Restart IDE → Restart.
- The plugin is now installed.
