IntelliJ Plugin
The Aion4j plugin for IntelliJ is packed with features that can help speed up your contract development. You can compile, deploy, and call your contract to a local or remote node, all from within the IntelliJ IDE. In this section, we're going to walk through the entire workflow of creating and deploying an application to the Aion testnet.
Prerequisites
First up, you need IntelliJ and the Aion4j plugin installed. Take a look at those sections for steps on how to get them installed. You’ll also need a node to connect to if you want to deploy your contract to the testnet, but we’ll walk you through that bit.
Create a Project
IntelliJ and Maven work together to create a basic project template that you can use to build your applications.
- Open IntelliJ
- Click Create new Project.
- Select Maven from the left panel.
- Check the Create from archetype checkbox.
- Expand
org.aion4j:avm-archetypeand select the latest version. - Enter a Group ID and an Artifact ID. You can leave Version as the default.
- Click Next.
- Leave the Maven defaults selected and click Next.
- Click Finish.
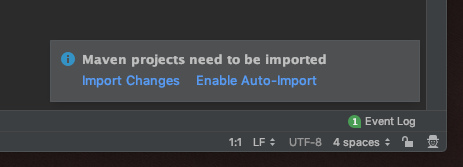
Once the project has been created, you can have IntelliJ automatically import Maven projects for you by clicking on the pop-up in the bottom right of the screen.
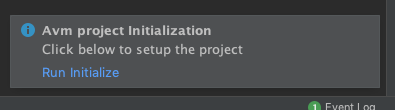
Initialize Project
This step pulls the avm.jar file that’s going to run all your contracts locally.
- Right-click anywhere in your project.
- Select Aion Virtual Machine → Run Initialize.
You can also run this step by clicking on the pop-up that is shown after you create your project.
View your Contract
The Aion plugin creates a contract and unit tests for you by default. Within the src folder are two directories:
main: This is where the main logic of your application (ie your contracts) are stored.test: Any tests you use are stored here. The Aion IntelliJ plugin creates some tests for you to use straight away.
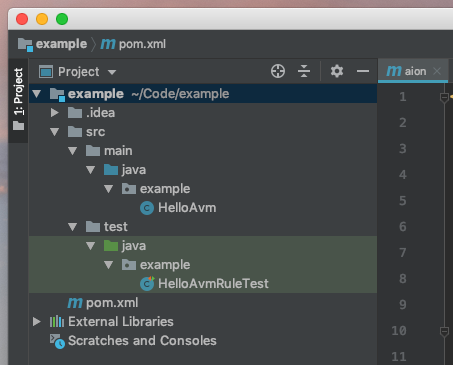
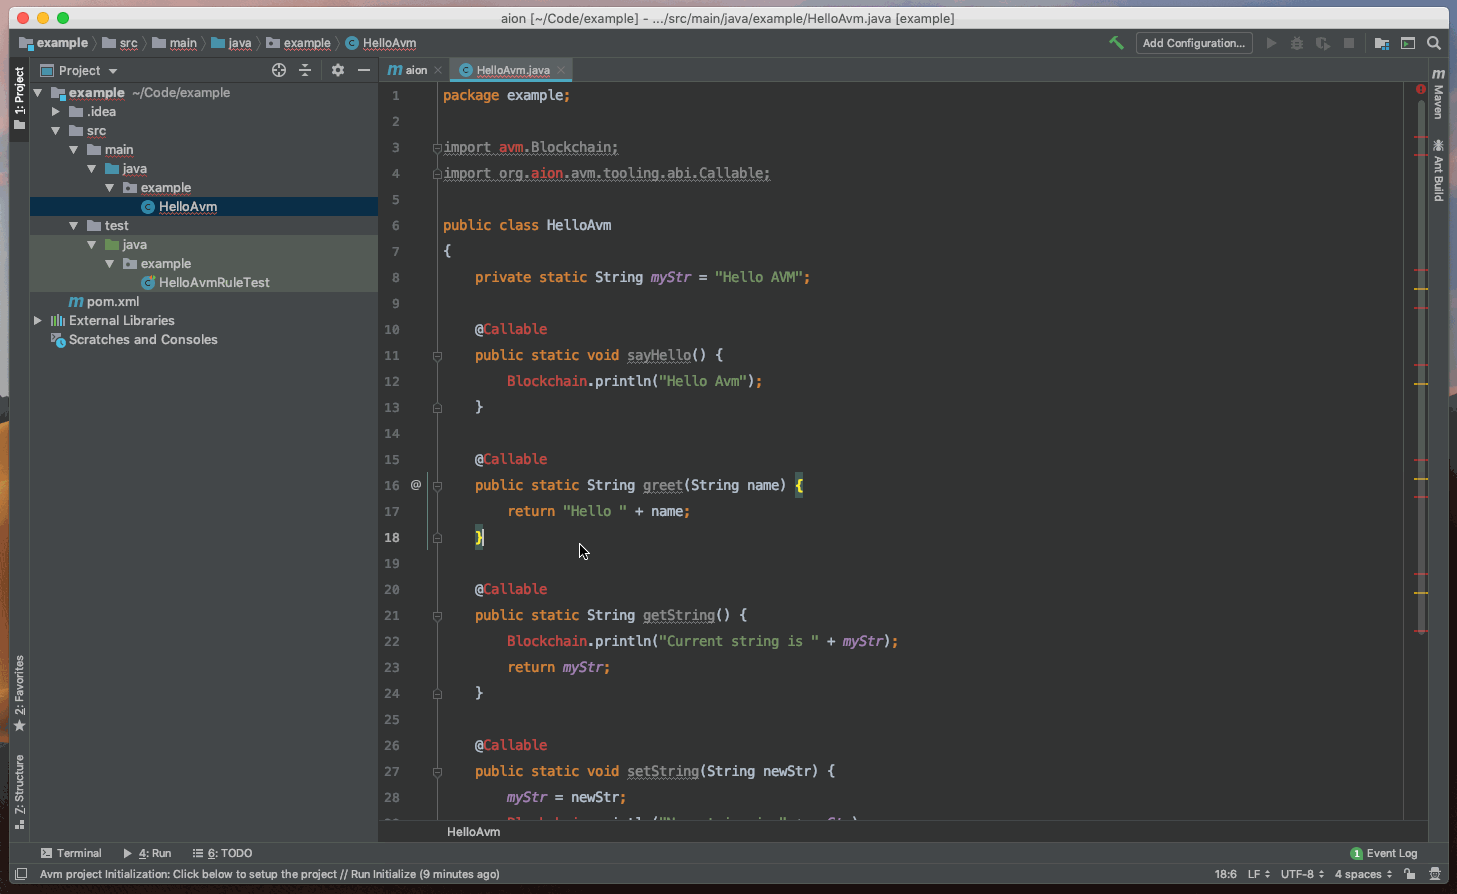
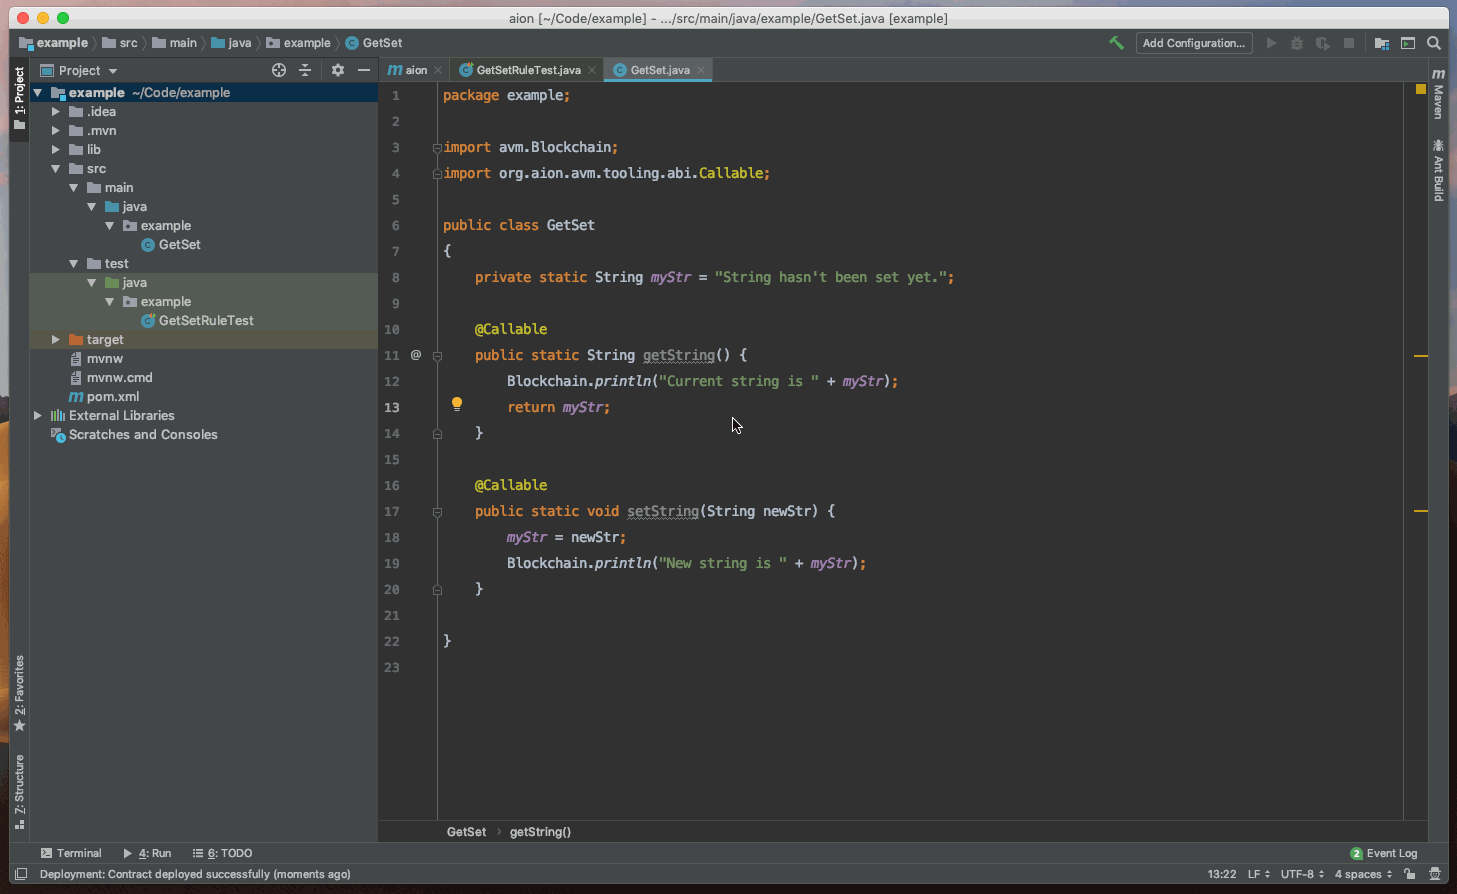
To view your contract open src → main → java → the name of your project → HelloAvm. This is your contract. By default, it’s just a simple Hello World type contract with a few methods, including the getString() and setString() methods.
Edit your Contract
We’re going to customize this contract a little bit, so you can have a taste of how IntelliJ and the Aion plugin work together.
- Open your contract in the editor.
- Remove the
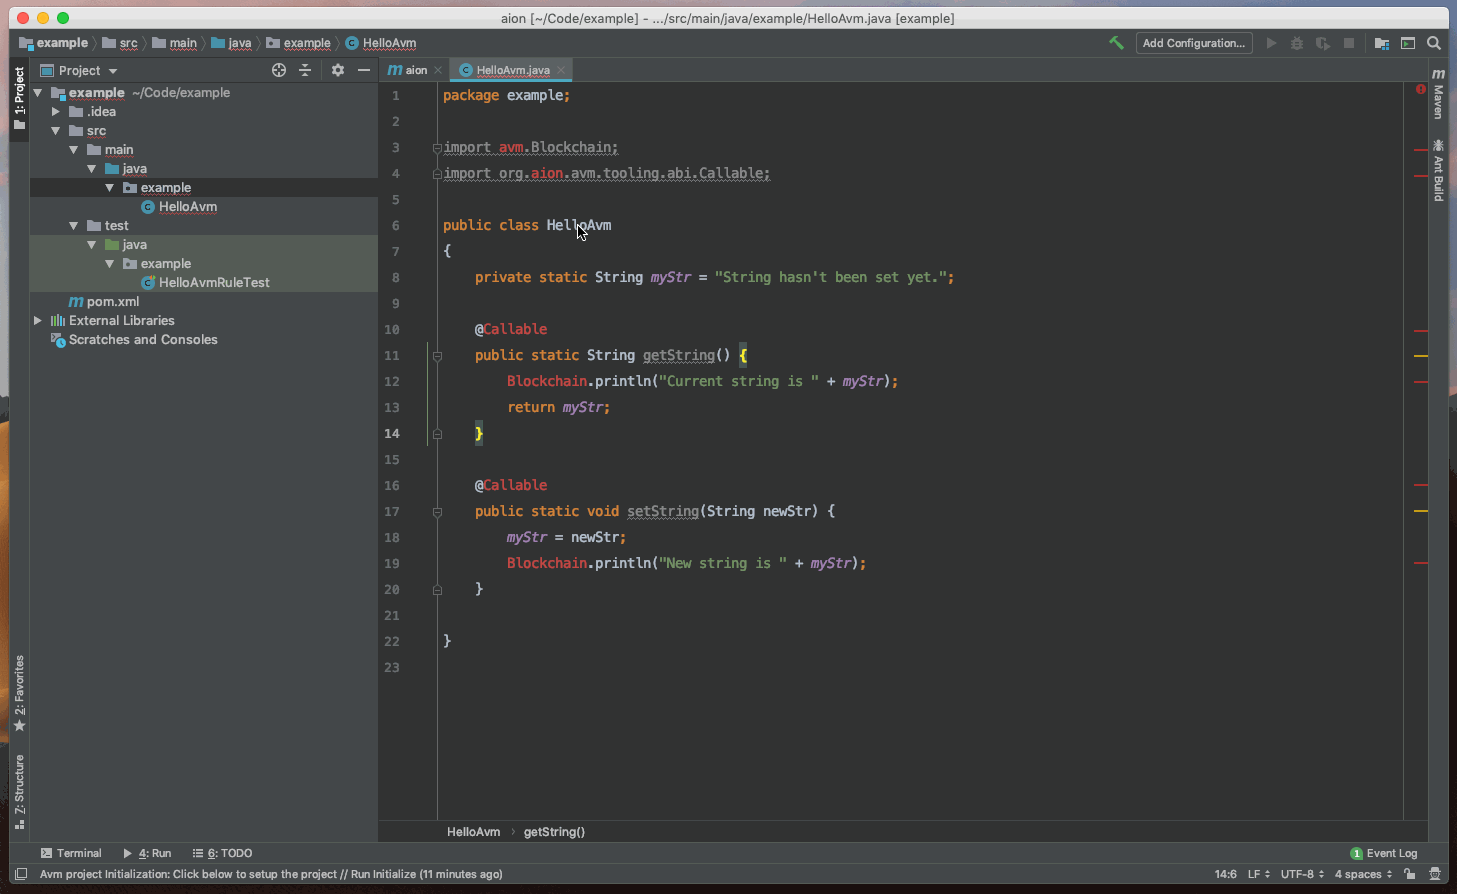
sayHello()andgreetfunctions. Make sure to remove their associated@Callableannotations too. - Change the
myStrvariable toString hasn't been set yet..
We’re also going to rename the contract, so that it’s called something more suitable:
- Change the
public classname toGetSet. - Right click on the
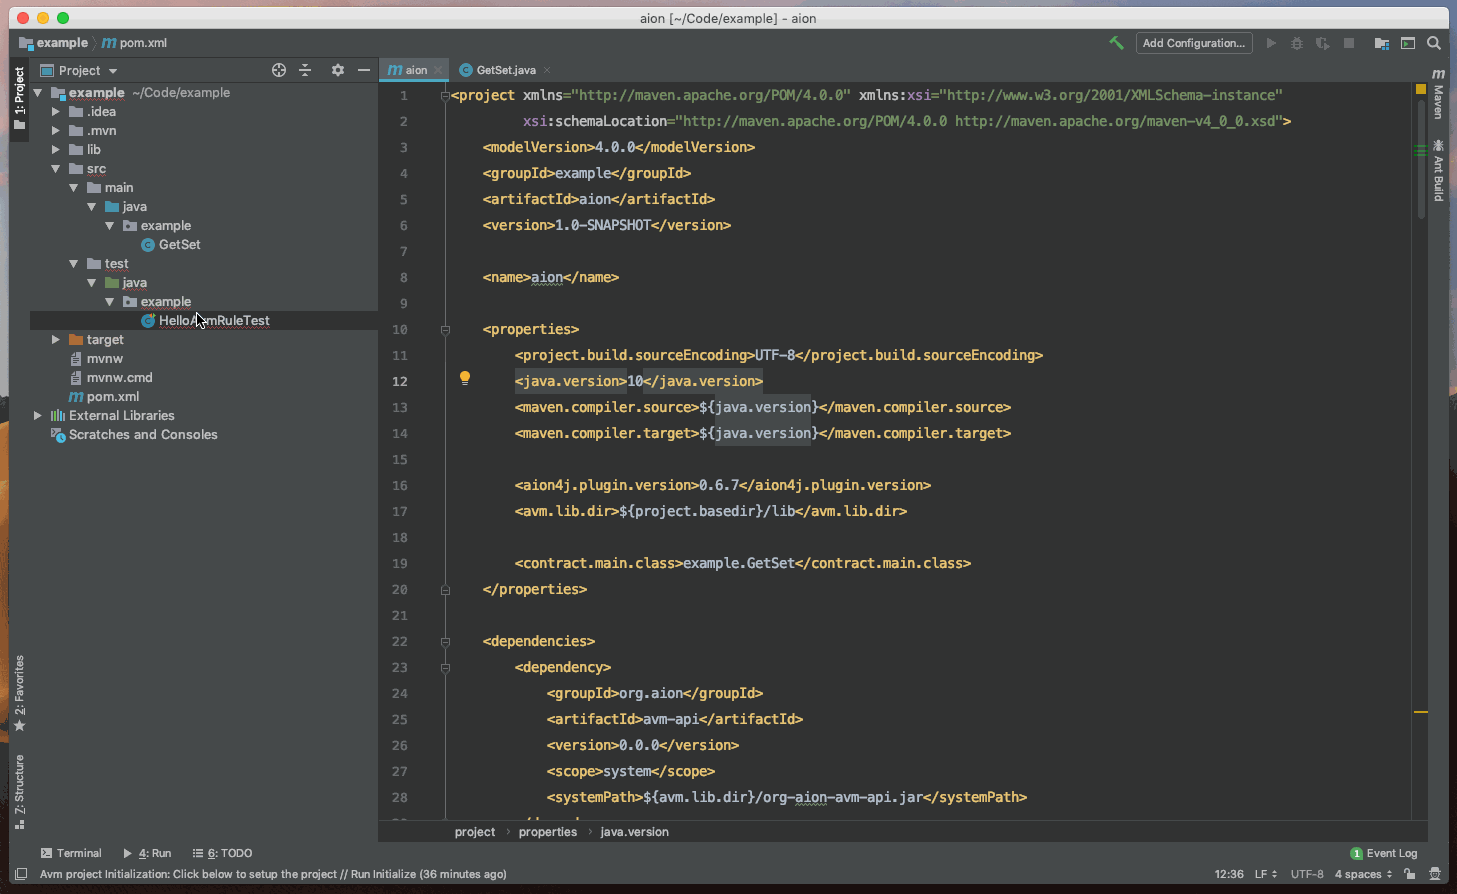
HelloAvm.javafile, click Refactor → Rename and change it’s name toGetSet. - Open the
pom.xmlfile and changeexample.HelloAvmtoexample.GetSet.
It is important that all three of these name changes are identical. The pom.xml file tells Maven which Java file to use. Java classes should always be within a file of the same name as the public class.
Run Tests and Debug
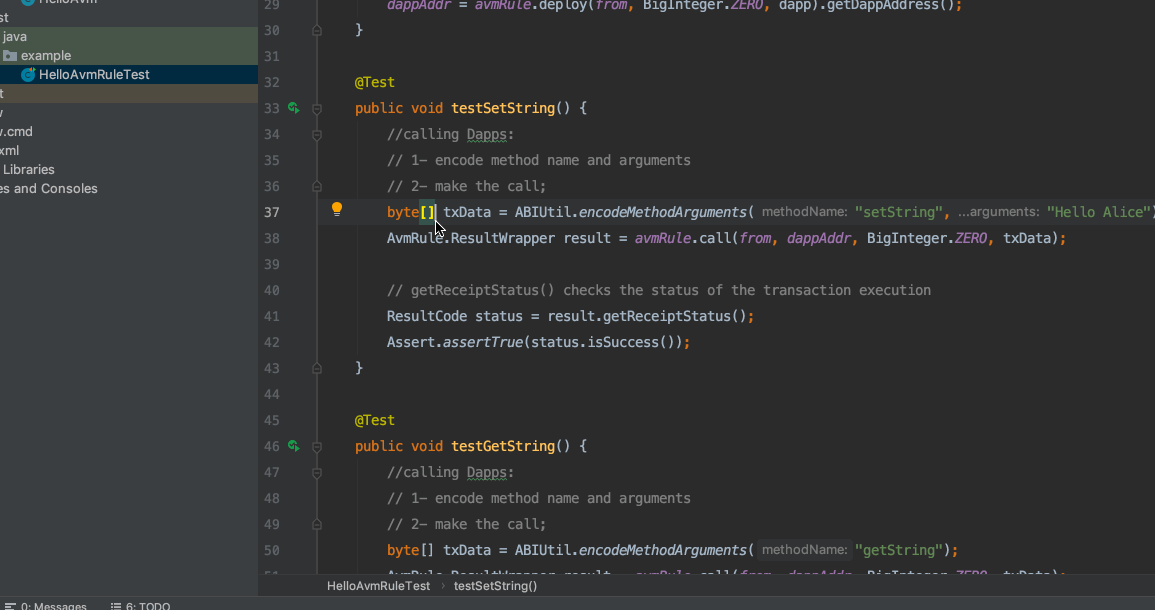
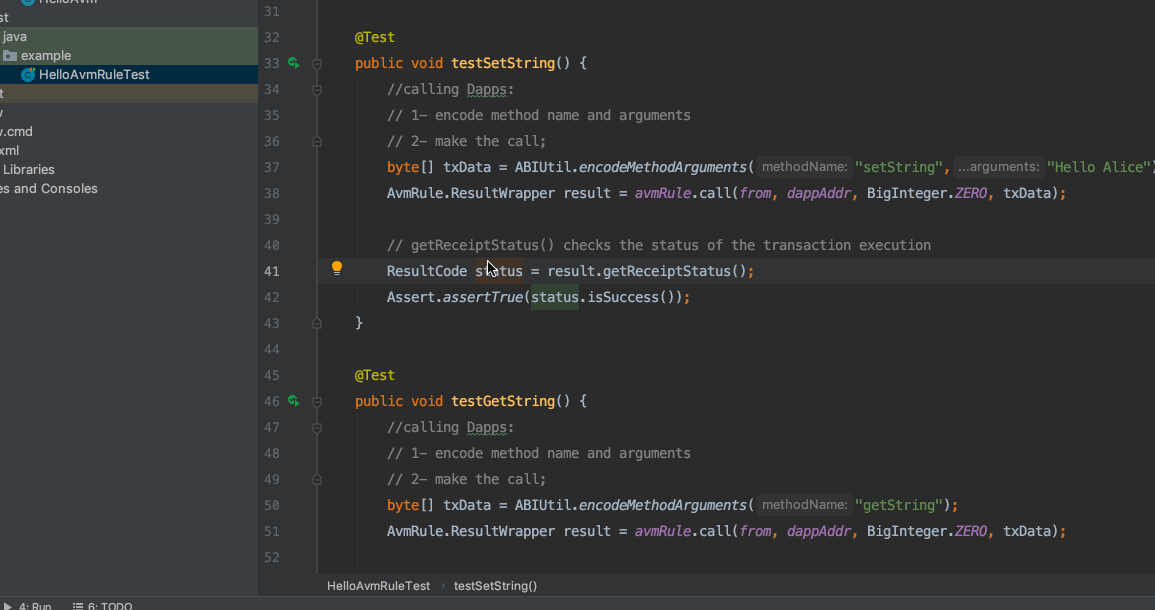
All the Junit tests for your contract are stored in the src/test/java/<your_project_name>/ folder, and you get a standard AVM rule test when you create the AVM project called HelloAvmRuleTest. The test class has three actual tests @Test, and one function that runs at the start of every test @BeforeClass. You can learn more about AVM JUnit tests if you are not familiar with it.
Since we removed the sayHello() function from our contract and rename the Java class, we need to do a couple of things before we can run our test:
- Rename the
HelloAvmRuleTesttoGetSetRuleTest. - IntelliJ should automatically rename the
public classto match. If it doesn’t, change it manually. - Remove the
testSayHello()function from within the test class. - On line
28renameexample.HelloAvmtoexample.GetSet.
Now that we’ve sorted that out, we can start running out tests! To run a test, just click on the play button next to the test function.
You can also set a breakpoint in your contract and run the test in debug mode, which gives you more information on what’s happening in the test.
Finally, you can run all the tests in the class at once by selecting the icon next to the class name.
Deploy to Local
Now we’ve made some basic changes and ran some tests, we’re going try deploying the contract to the local kernel.
- Right click on the root folder of your project in the navigation panel.
- Click Aion Virtual Machine → Embedded → Deploy.
- Click OK.
And you’re done. You’ve just compiled your contract and deployed it to the local kernel. It’s that easy.
Call from Local
Let’s try and call the contract we just deployed.
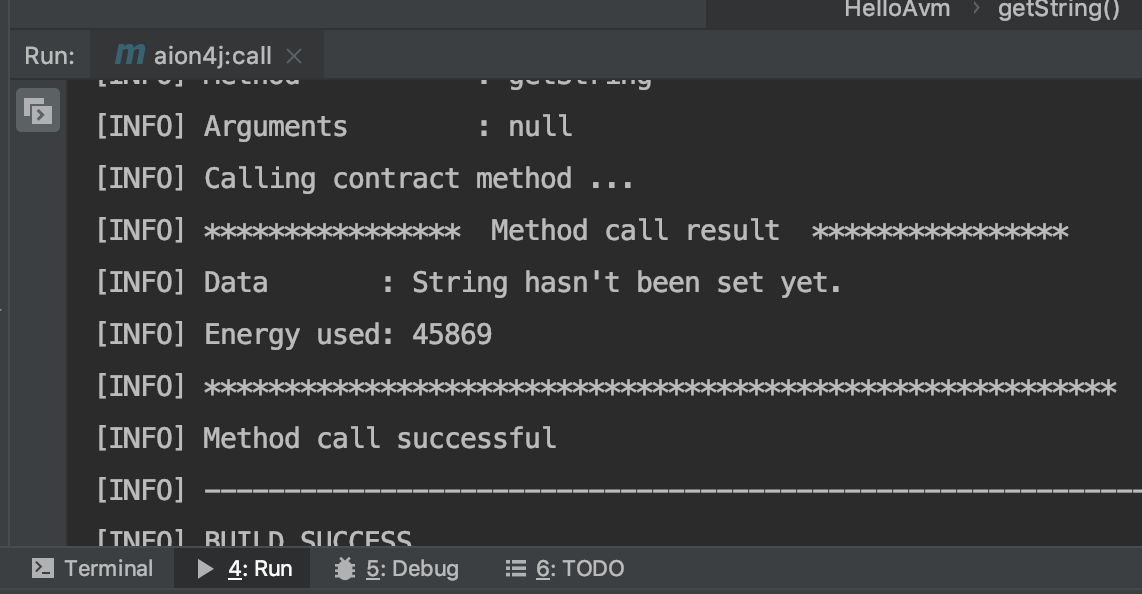
- Right click on
getString(). - Click Aion Virtual Machine → Embedded → Call.
- Click OK.
You’ll be able to see the results of the call in the terminal window.
Let’s try setting a new string.
- Right click on
setString(). - Click Aion Virtual Machine → Embedded → Call.
Enter a new string into the
newStrfield.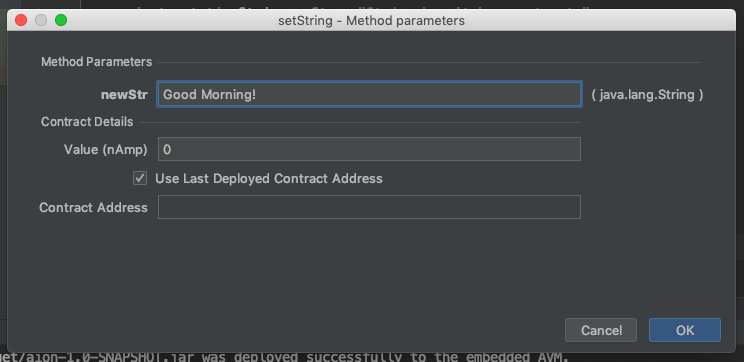
Click OK.
Now try calling the getString() method again. You should be able to see your new string in the terminal window.
Deploy to Aion network
Deploying to a remote kernel follows the same process as deploying to a local kernel. We just need to grab a node URL, create an account, and add funds into it.
Remote Node URL
If you’ve got a node running on your network, grab the URL address. If you’re not running your own node, you can get one from Nodesmith for free!
- Head over to nodesmith.io and sign up for free.
- Once you’ve logged in, click Aion from the sidebar and copy the
AmityURL.
Now that you’ve got a node URL you need to enter it into IntelliJ.
- In IntelliJ right-click anywhere within your contract, or on the top level folder in the navigation pane.
- Click Aion Virtual Machine → Configuration.
- Paste in your node URL into the Web3 Rpc Url field.
- Click OK.
Account and Tokens
Whenever you deploy something to a live blockchain network, that transaction needs to be paid for with funds from an account. Luckily, when you’re deploying to a test network then you can use test-tokens that don’t actually cost anything.
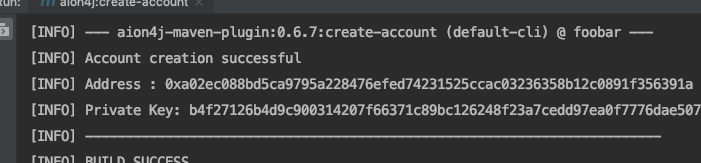
First up, let’s create an account.
- In IntelliJ right-click anywhere within your contract, or on the top level folder in the navigation pane.
- Click Aion Virtual Machine → Remote → Create Account.
The terminal window will then print out both your address and private key.
Highlight and copy the
Private Key.Right-click anywhere within your contract, or on the top level folder in the navigation pane.
Click Aion Virtual Machine → Configuration.
Paste your private key into the Private Key field.
Click OK.
Back in the terminal window, highlight and copy your
address.Right-click anywhere within your contract, or on the top level folder in the navigation pane.
Click Aion Virtual Machine → Configuration.
Paste your
addressinto the Account (default) field.Click OK.
Now we have both our node and account in IntelliJ. But there’s one issue, we still don’t have any funds. If you call Aion Virtual Machine → Remote → Get Balance (Default), you’ll be able to see in the terminal window that you balance is set to 0 (0.000000000000 Aion). So our last step before we can deploy is to add funds into our account.
- Copy your
addressagain. You can view it by opening Aion Virtual Machine → Configuration and copying the Account (default) field. - In your browser, go to faucets.blockxlabs.com and sign up.
- Once you’re logged in, click Aion and paste in the
addressyou just copied. - Click Press to Pour to get your tokens.
- After a few seconds, you should be able to see your balance after calling Aion Virtual Machine → Remote → Get Balance (Default).
Deploying
Now that we’ve got our node setup and an account with some test tokens in it, we can actually get around to deploying our application!
- Right click on the top level folder in the navigation pane.
- Click Aion Virtual Machine → Remote → Deploy.
- Click OK.
The Aion plugin will now attempt to deploy the application. Because we’re dealing with an actual network here, and not just a local kernel, the deployment has to be confirmed by multiple nodes on the network. The terminal window will output:
[INFO] Waiting for transaction to mine ...Trying (1 of 15 times)
[INFO] Waiting for transaction to mine ...Trying (2 of 15 times)
[INFO] Waiting for transaction to mine ...Trying (3 of 15 times)
Once it’s done you should be able to see:
[INFO] BUILD SUCCESS
If you scroll up, you can find the contract address:
"contractAddress": "0xa0e6f3c3479ba2a9853ea68f9325d3035841e92599d406939e3b274f1ceb82f4",
Call from Remote
The process for calling your contract on the network is the same as calling it from the local kernel.
- Right click on the function you want to call.
- Click Aion Virtual Machine → Remote → Contract Transaction/Call.
- Enter any arguments the function needs and click OK.
- The response from the network is printed in the terminal window below.
Summary
And there you have it. You created a contract, tested it, deploy it to the local kernel, made some local calls, created an account with funds, connected IntelliJ to an Aion node, deployed the contract to the Aion Testnet, and finally called it! You’re now ready to go and create some incredible dApps!